为了便于利用 ELK日志平台收集展示 Nginx 的日志,可以将 Nginx 的日志改成 json 的格式.
1. 配置
1.1 修改 nginx 配置
vim /etc/nginx/nginx.conf
1
2
3
4
5
6
7
8
9
10
11
12
13
14
15
16
17
|
log_format json '{ "time_local": "$time_local", '
'"remote_addr": "$remote_addr", '
'"referer": "$http_referer", '
'"request": "$request", '
'"status": $status, '
'"bytes": $body_bytes_sent, '
'"agent": "$http_user_agent", '
'"x_forwarded": "$http_x_forwarded_for", '
'"up_addr": "$upstream_addr",'
'"up_host": "$upstream_http_host",'
'"up_resp_time": "$upstream_response_time",'
'"request_time": "$request_time"'
' }';
access_log /var/log/nginx/access.log json;
|
1
2
| > /var/log/nginx/access.log
systemctl restart nginx
|
通过浏览器访问, 可以看到 json 输出的日志
1.2 修改 filebeat 配置
vim /etc/filebeat/filebeat.yml
1
2
3
4
5
6
7
8
9
10
11
| filebeat.inputs:
- type: log
enabled: true
paths:
- /var/log/nginx/access.log
json.keys_under_root: true
json.overwrite_keys: true
output.elasticsearch:
hosts: ["localhost:9200"]
|
1.3 filebeat 服务
sudo vi /lib/systemd/system/filebeat.service
1
2
3
4
5
6
7
8
9
10
11
12
13
14
15
| [Unit]
Description=journalbeat
After=network.target
[Service]
Type=simple
User=root
Group=root
Restart=no
WorkingDirectory=/home/elasticsearch/workspace/filebeat-7.10.1-linux-x86_64/
ExecStart=/home/elasticsearch/workspace/filebeat-7.10.1-linux-x86_64/filebeat
PrivateTmp=true
[Install]
WantedBy=multi-user.target
|
systemctl start filebeat
2. kinaba查看
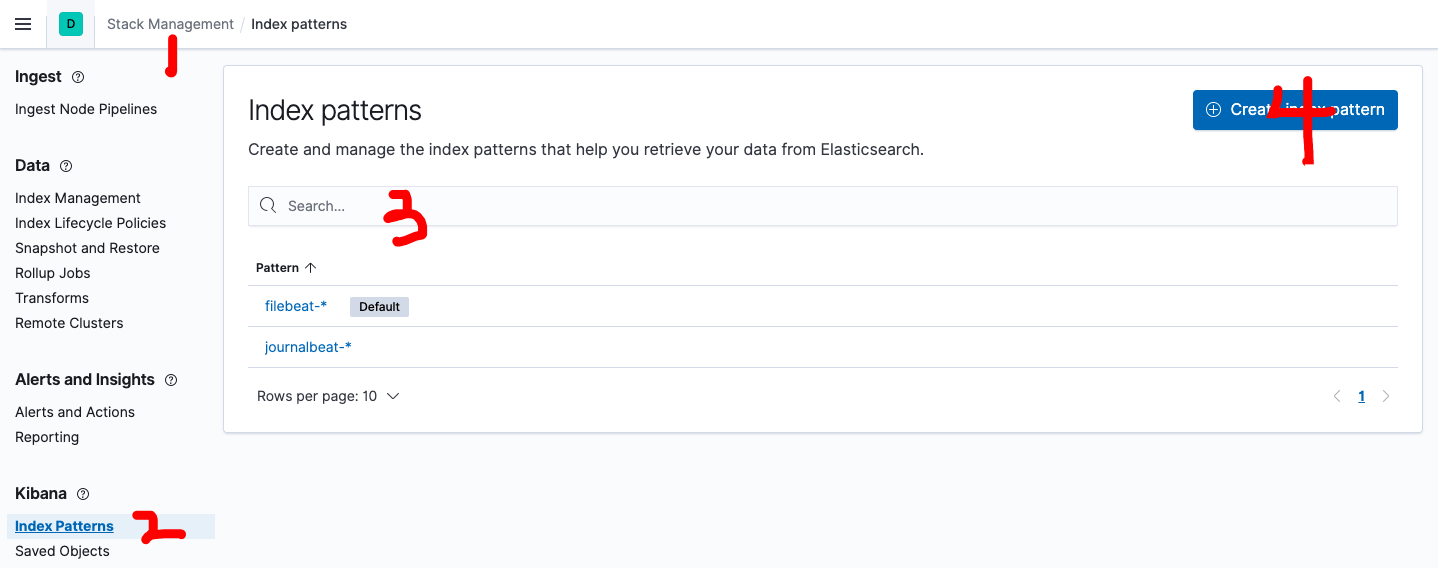
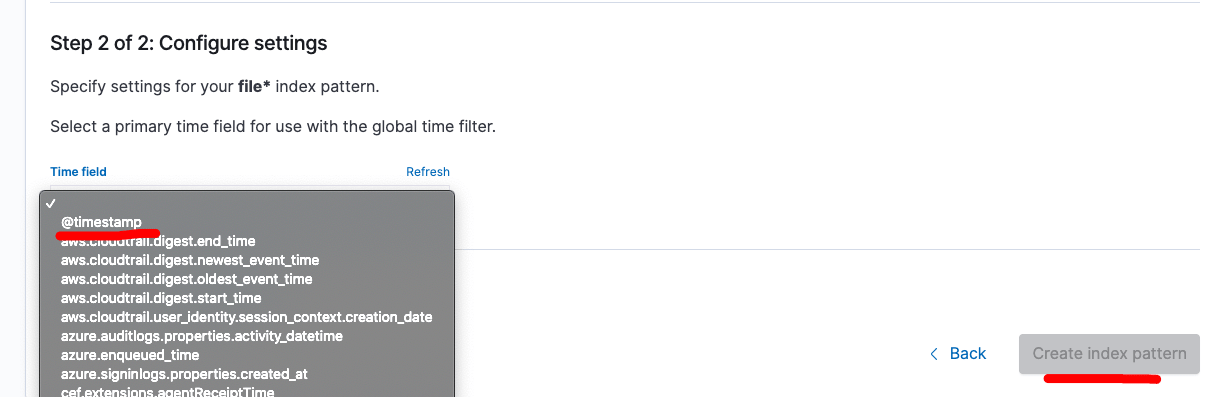
2.1 创建索引
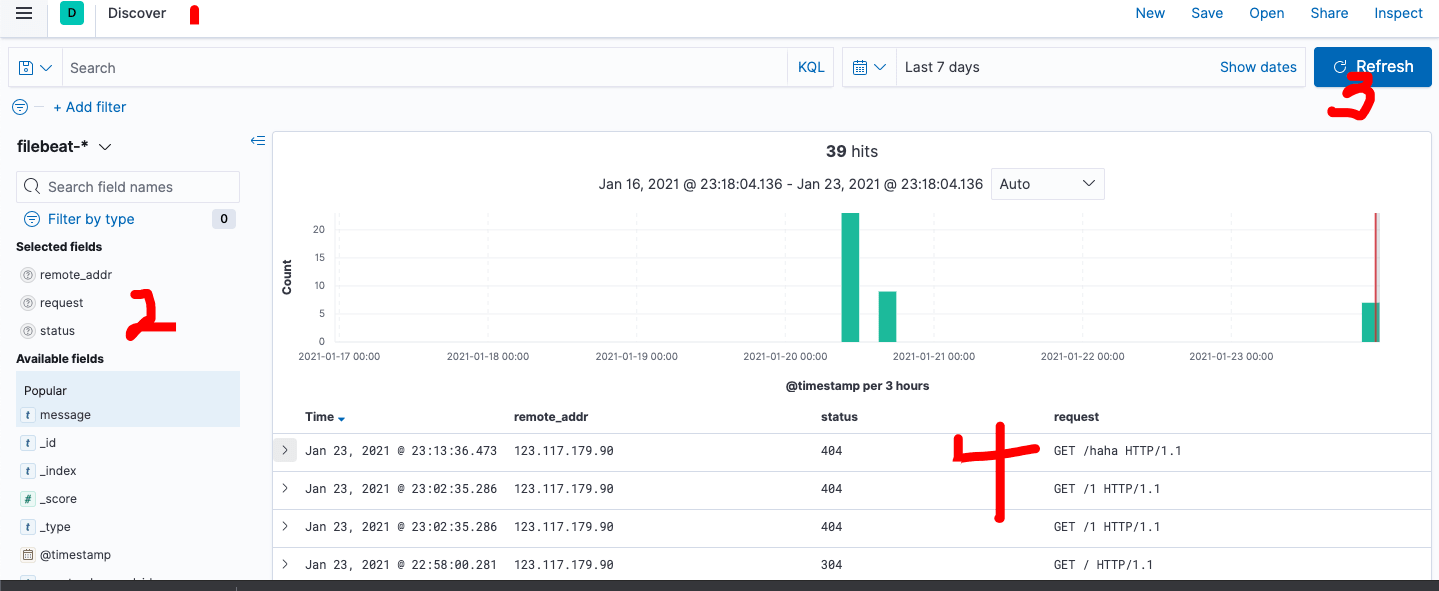
2.2 查询
3. 参考资料